Managing contractor invoices can be complex, but Remote Payments makes it easier. This guide will explain how Remote Payments works and how to onboard through Nium, our financial partner, ensuring seamless contractor management.
See also: What is Remote Payments?
In this article, we will cover the following:
How does it work?
Remote partners with Nium, a licensed financial services provider, to handle fund transfers between your company and your team members. Here’s how it works:
- Onboarding with Nium: You will onboard each entity (i.e., subsidiary or company branch) that you wish to use for contractor payments through Nium (in applicable jurisdictions). Each entity will be assigned a virtual IBAN/account number which can be used to pay for your contractor invoices.
-
Paying for your contractor invoices: You can pay for your contractor invoices using direct debit or card where feasible and bank transfer. You also have the option to pre-fund and excess balance will automatically be refunded to your bank account on file.
- Note: if paying by bank transfer, make sure to send a separate bank transfer for each transaction receipt. Do not group multiple transaction receipts into one bank transfer, as this will delay payments to contractors.
- The specific documents required during onboarding vary from company to company. Any additional documents required will be requested during Nium’s compliance review.
How to set up Remote Payments
-
Login to your Remote account to sign up for Remote Payments. The application is only available for Owner or Authorized Representative admin roles, to comply with regulatory requirements.
- Note: Due to Strong Customer Authentication (SCA) requirements, you will be automatically logged out after 5 minutes of inactivity. You will need to complete a full authentication process (username, password, and authenticator app) to log back in. This security measure is in place to protect your financial data when using Remote Payroll Payments.
-
Set up Two-Factor Authentication:
-
As compliance and security is important to Remote, we must follow SCA rules in the EEA & UK.
-
You and your contractors will need to set up two-factor authentication (2FA) on your account.
-
The Owner or the Authorized Representative must set up the authentication for your account.
See also: How can I activate two-factor authentication for my account?
-
-
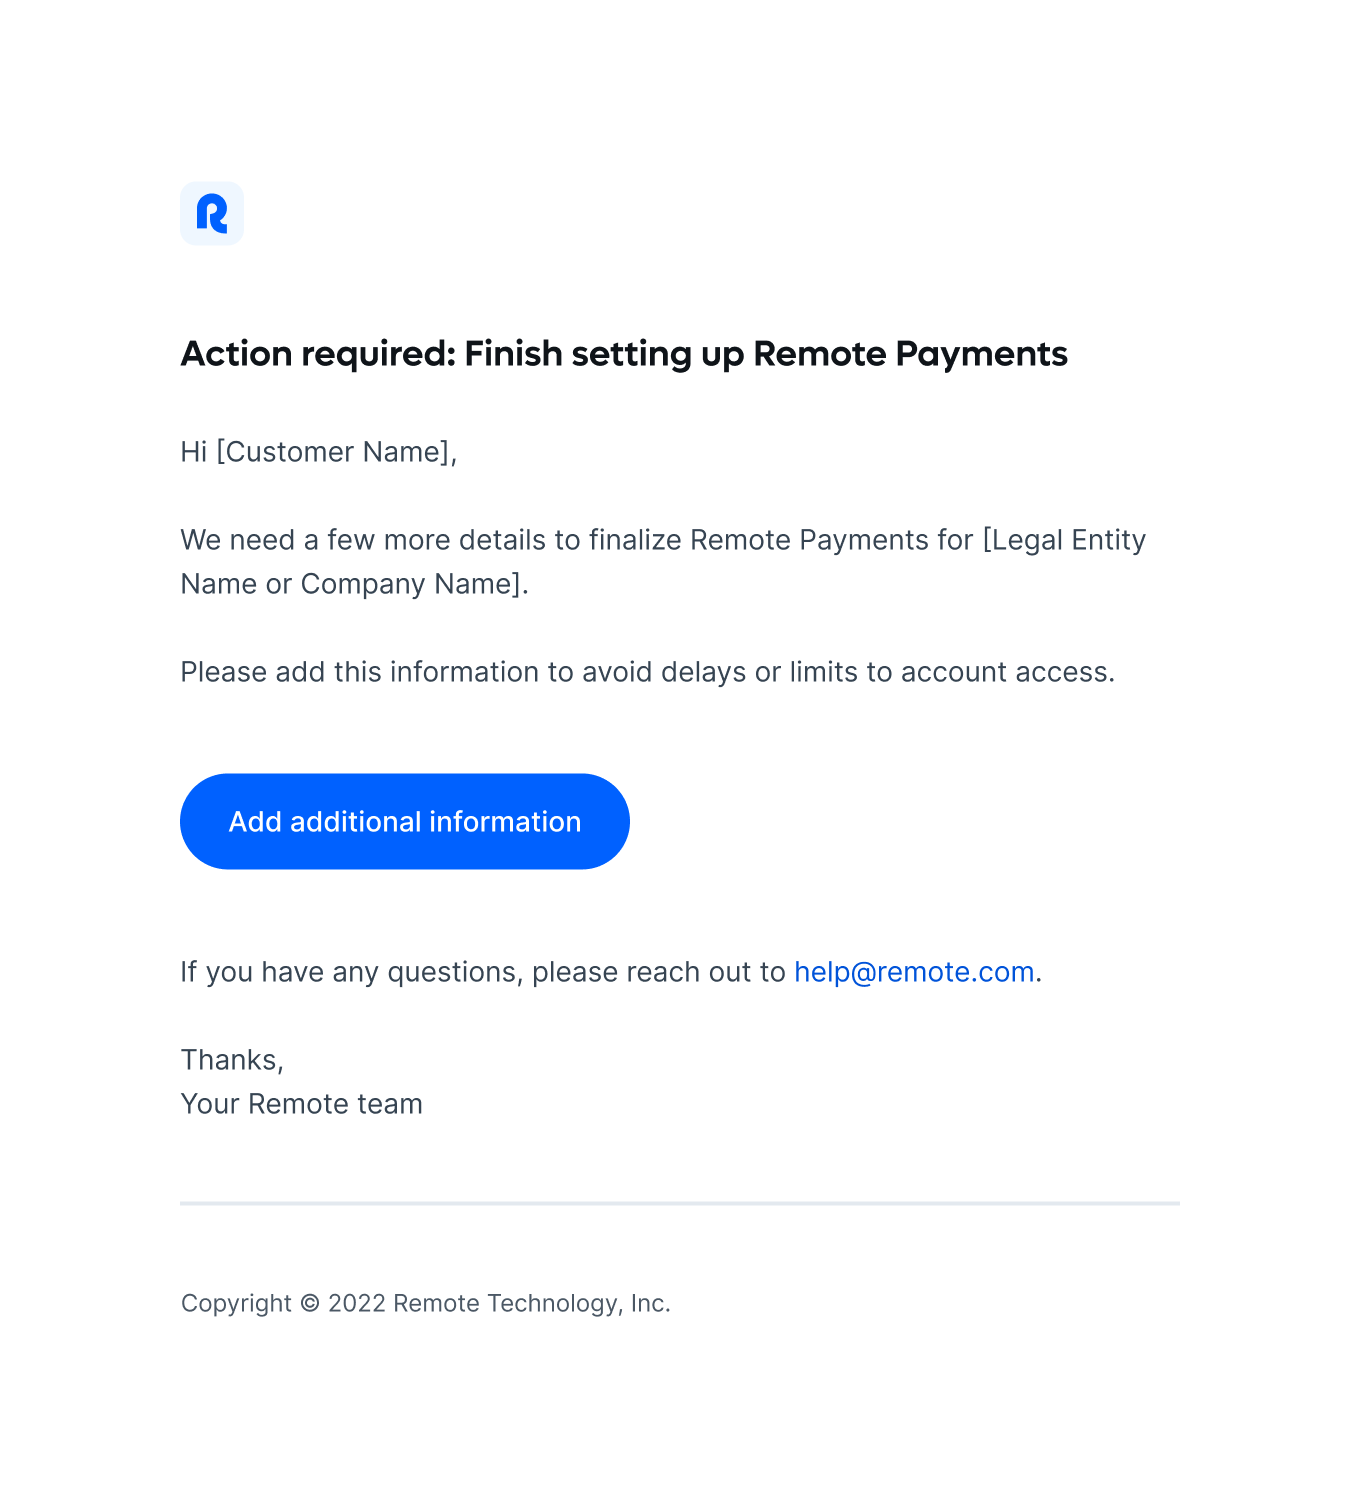
Once you login, you will see the notification to set up Remote Payments under the Things to do section. Click on it to get started. The Set up Remote Payments button is also available in the Notifications icon in the top right corner of your Remote dashboard. Select the notification to get started.
-
As part of the onboarding process, you’ll need to provide certain business details for verification by our payment provider. Simply enter your business registration number, and Remote will pre-fill most of the required information if available. Please review and confirm its accuracy before submitting, as this is required by regulators. If pre-filled information is not found for your company, please input the requested fields manually.
Company details [will be mostly auto-filled with existing information]
-
Basic Company Details:
- Business type
- Business name
- Business registration number
- Trade name (if applicable)
- Website
- Registered address: The address listed in official company documents and registrations
- Business address: The address where the business conducts its activities
-
Legal details:
- Registration date
- Registered country
- Tax ID (EU Only)
-
Business registration documents:
- List of all directors and shareholders (mandatory) - should include a list of all directors as reported on the applicable government business registry
- Source of Wealth document (recommended; helps reduce reduce the need for additional information requests)
- Ownership Chart (recommended; provides clarity on company structure and helps prevent verification delays)
Applicant details
-
Professional details:
- Applicant’s role within the company
Note: It is strongly recommended that a director, as named in the business registration document, fills out the application. If not a director or higher, you will be required to provide an Letter of Authorization document confirming you have the legal authority to act on behalf of your company (see below).
- Applicant’s role within the company
-
Basic details:
- Name
- Nationality
- Date of birth
- Residential address
-
Contact Information:
- Phone number
-
Documents:
- Letter of Authorization - only needed if director is not applicant (see above)
- Must be dated within a year
- Global LOA (Letter of Authorization) template available here: https://www.nium.com/corporate-onboarding/verifying-your-business-in-uk#heading-5
- Note: The LOA does not need to be notarized if the signing director is based in same jurisdiction where the company is registered
- Proof of address
- Accepted documents: Bank statement, utility bill, tax return, government-issued letter, driver’s license (both sides), or passport (if address is listed)
- Note: Proof of address must be dated within the last 90 days and clearly show full name and address
- Letter of Authorization - only needed if director is not applicant (see above)
Stakeholder details
-
Corporate Stakeholders - this includes parent companies, subsidiaries, and major corporate investors with 25% or more ownership
- Business name
- Business registration number
- Position within ownership structure
- Share percentage
- Registered country
-
Individual Stakeholders - this includes all company directors as listed on your official registration, as well as Ultimate Beneficial Owners (UBOs) with 25% or more ownership
- Name
- Nationality
- Date of birth
- Address
- Position/job title
- Share percentage
-
Notes:
- An Ultimate Beneficial Owner (UBO) is any individual who directly or indirectly owns or controls 25% or more of the company
- A director is a registered member of the board responsible for the company’s management and oversight. Directors may or may not be UBOs
- If no single individual holds 25% or more of ownership shares, directly or indirectly, the most Senior Director would be considered as the Controlling Person. In these cases, you will be required to provide a Controlling Person declaration form (see below).
- Controlling Person declaration template available here: https://www.nium.com/corporate-onboarding/verifying-your-business-in-uk#heading-9
- Please ensure the UBO information is up to date and matches the information reported through your local UBO registry (e.g. UK Companies House, Netherlands KVK)
Account Usage details
-
Account usage details:
- Annual payments turnover - the amount to be processed as contractor payments through Remote
- Business industry
- Top 3 payout countries - the jurisdictions where your contractors reside & where invoice payments will be sent
ID Verification
- The applicant will verify their identity by taking a selfie alongside their government issued identification card. Please note the following to ensure a successful verification:
- The inquiry must be completed in one session. Please have your government ID available before clicking the verification link.
- Use your original, physical government ID to complete the process. Photocopies or other replicas are not accepted.
- ID must be an unexpired passport or national ID. Driver's licenses are not accepted.
Next steps for you
- Once set up, you’ll receive another email letting you know that you’re good to go! You’ll be able to set up and use direct debit, card, or bank transfer payment methods on the platform.
- Note: Please be advised that your contractors will not be able to add a withdrawal method until your Remote Payments setup is complete.
Comments
0 comments
Article is closed for comments.